
Meal prepping (or food prepping) is a great way to save time AND stay on track to meet your goals by preparing your healthy food in advance. Use this Step-by-Step Guide to Meal Prep effectively and make the most of your budget and time.
You’ve heard (aka read) us talk about meal prepping for years now. It’s no secret that meal prepping has been one of the main ways we’ve maintained a healthy lifestyle for so long. We started meal prepping at the very beginning of our journey and have done it consistently every week since the summer of 2011. Man, TIME FLIES!
WHAT IS MEAL PREPPING?
Meal prepping is where one prepares their meals in advance.
Deciding what you will prep each week will take some time. It will get easier each week as you determine what your “staple” foods are and determine which new recipes are your favorites and which you may not want to make as frequently.
Typically, meal prep involves making a majority of your meals for the week – this includes breakfast, lunches, and/or dinners. However, some people do meal prep for breakfast and lunch and then cook dinner each day. You may also choose to make snack items, like homemade protein bars, and wash and chop your vegetables.
We don’t spend all day in the kitchen but we do set aside a few hours to prepare meals. No matter how you want to do it, anything you can do in advance will set you up for success.
BENEFITS OF MEAL PREPPING
- Save money
- Less food waste
- Stay on track to meet goals
- Save time
Food prep just might be the single most important thing that you do related to your health and fitness journey – especially if you are focused on losing body fat and building muscle. Fueling your body with well planned, proper meals and nutrients allows your body to function more efficiently.
Having prepared clean meals available when you need them takes the pressure off of the age-old question, “What’s for dinner?” and saves you from making poor decisions in a moment of hunger.
Having food prepped will give you more time during the week to devote to your workouts or just relax! If you prep your food you will always have clean food on hand and no excuse to grab something unhealthy. The lack of preparation is the perfect formula for failing to meet your goals. P.S. Pair your meal prep with one of our workout plans for the best results. 😉
THE CONDENSED VERSION OF HOW TO MEAL PREP
- MEAL PLAN
- Write out the meals that you want to eat the following week.
- Try to incorporate lean protein, complex carbohydrates, and healthy fats into your diet.
- Don’t forget the veggies and fruit! We typically limit fruit to twice per day.
- If you are a beginner, start with just one meal to prep.
- SHOP
- Once you have your meals written out, shop your pantry first and then make a list of what you need to buy.
- COOK
- To make the most of your time, utilize a crockpot or pressure cooker (we use an Instant Pot). You can have something cooking in one of these while you are also using the oven, grill, or stovetop to prepare another meal.
- Wash and chop your fruits and vegetables for easy grab-and-go.
- STORE
- Portion out your meals so they are easy to grab-and-go in the mornings.
- Utilize meal prep storage containers. We love these plastic containers with a divided base and these glass meal prep containers with compartments.
THE LONG VERSION OF HOW TO MEAL PREP
Don’t let all of this scare you – meal prepping really isn’t difficult and it doesn’t take all day! This is a long post just because we describe everything in detail but please, don’t be scared away! 🙂
HOW TO GET STARTED
Food Prep is typically done on a weekly or bi-weekly basis, with some exceptions. Days you will actually do your food prep will not only depend on your schedule but also on your particular needs for that week. Each week may not be the same!
- Decide what meals you are going to eat for the week.
- Write down what you are going to cook and make your grocery list.
- Designate one or two day(s) per week to prep all of your food.
DETERMINE YOUR NEEDS
The amount of food that you will have to prep is entirely dependent upon your needs (and perhaps that of your family) on a week-by-week basis. What you made the previous week may be too much or too little then you need for the current week.
Start by asking yourself the following series of questions:
- What do you want to eat?
- How often do you want to change your meals?
- Can you make something that can be prepared/eaten in different ways?
- Are you a picky eater? Is anyone in your family a picky eater?
- Will your family be eating the same meals/food as you?
- Which meals will you be at home to eat? Which meals do you need to pack?
- Do you have access to a refrigerator/microwave on the go?
Plan meals that have different tastes, but utilize similar ingredients. This will allow you to create multiple items from one prepped item, as well as maximize your budget at the grocery store. This also fights food boredom – something that plagues many clean eaters and wrecks goals!
PREPARE FOR MEAL PREP
Preparation of your kitchen, including having appropriate appliances, gadgets, and tools, is key in effectively preparing your food for the week. More food can be made, time can be saved, and your goals can become a reality faster than you ever dreamed possible.
Pantry Prep
Stocking Your Pantry:
Stock your pantry with items that you will most likely use every time you complete food prep. This includes spices, baking needs, canned (BPA-free cans) or box foods, and protein powders. You can also purchase frozen vegetables and fruit that are washed, chopped, and ready for use whenever you need them!
Consider purchasing many of the items you use on a regular basis in bulk to stretch your budget.
Items we suggest having on hand at all times:
- Spices
- Garlic Powder
- Onion Powder
- Chili Powder
- Cumin
- Black Pepper
- Sea Salt
- Baking Needs
- Stevia
- Oat Flour
- Steel Cut Oats
- Rolled Oats
- Almond Flour
- Coconut Flour
- Baking Soda
- Baking Powder
- Canned Items
- Organic Black Beans
- Organic Diced Tomatoes
- Miscellaneous
- Protein Powder
Storing Non-Perishable (or Slow-Perishable) Items in Your Pantry:
Storage is one aspect of building a clean pantry that is often overlooked. You get home from the grocery, or open your large Amazon box and just throw things in your pantry. NOT ANYMORE! Follow these steps to organize your pantry and not only extend the life of your food, but extend your food budget too!
- Place bulk items, such as oats and flour in a large glass or BPA-free plastic containers with clear labels identifying each item. This will allow you to easily find recipe ingredients and to accurately forecast your needs for future food prep.
- Purchase additional measuring cups and spoons and place in containers of items that you use frequently. Food prep will be much faster if you don’t have to find appropriate measuring tools and eliminate extra cleaning.
- Designate shelving in your pantry or storage cabinet for certain items. For example, keeping all canned goods together will allow you to easily inventory your needs for shopping and save time in the overall prep process.
Must-Have Appliances and Tools
PLAN YOUR GROCERY LIST
Once you have determined your menu and ingredient needs, quantify your food needs for each recipe that you are preparing. It is best to write down all ingredients required, adding needs for recipes that may utilize the same ingredient.
Separate your list into fruits and vegetables (produce section), meats and fish, canned goods, dairy, baking and miscellaneous. This will help you move through the store rapidly and eliminate the urge to purchase an item not on your list.
With list in hand, begin shopping your pantry. Spending extra money at the grocery is worthless! Always, always, always shop your pantry first.
EXECUTE YOUR COOKING
Once you have gathered all of your ingredients, it is now time to begin your actual food preparation and cooking.
Follow these steps to successful food preparation:
- Wash your hands before beginning and wipe down all surfaces that may come in contact with food – counters, stovetop, cutting boards, etc.
- Take your produce out and place it on your counter. Begin washing all produce you will need for your recipes. Items such as fruit that don’t require additional cooking or slicing can be stored in your refrigerator and washed prior to eating.
- Line up key ingredients on your counter so they are easily accessible as you begin to put together recipes.
- Start your first recipe. It is easiest to begin with one recipe that does not require much effort to cook after vegetables are chopped or meat is prepared. A crockpot recipe is typically best.
- For subsequent recipes, utilize all of your cooking surfaces/appliances at once to speed up the process. For example, have something baking in your oven while a skillet recipe and vegetables in a saucepan are cooking on your stove top.
- Remember to clean as you go! Nobody wants to clean a pile of dishes after spending a few hours in the kitchen. If you tackle the mess as it occurs, you will have more time to spend doing something else!
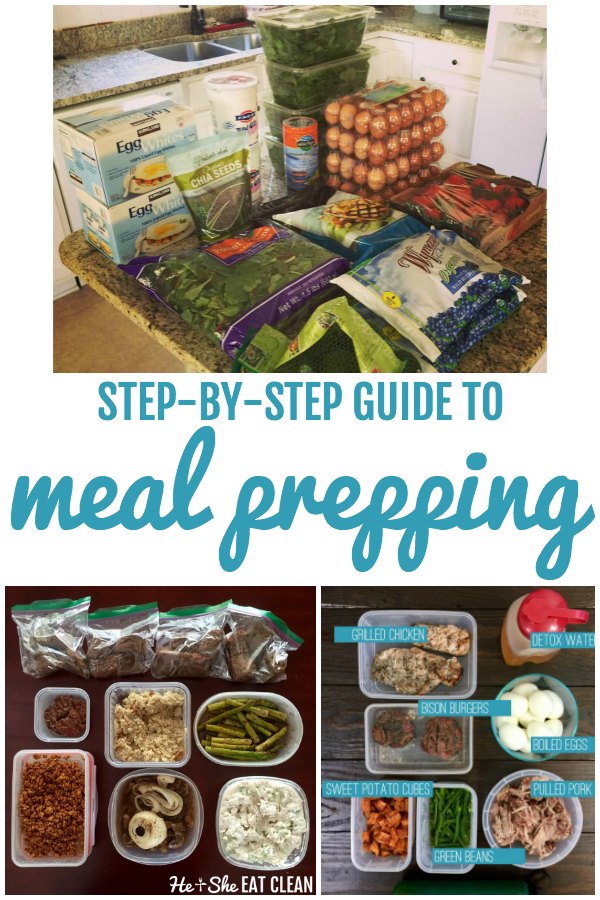
SAMPLE MEAL PREP FOR 2 INDIVIDUALS
Below is typically what we make on Sundays:
- 2 lbs Salsa Chicken (8 servings: will last for 4 days for 2 people)
- Monster Meatloaf (12 servings: will last 4-5 days for 2 people)
- 16 Boiled Eggs (will last 4 days for 1 person – Whitney eats these)
- 2 cups of Brown Rice (8 servings: will last for 4 days for 2 people)
- Sweet Potatoes (8 servings: will last for 4 days for 2 people)
- Homemade Protein Bars (will last 4 days for 1 person – Whitney eats these)
- Green Juice (will last 2 days for 1 person – Scott drinks this)
- Assorted Bagged and Chopped Veggies & Fruit
STORAGE/HOW LONG FOOD WILL LAST
We typically prepare 3-4 days of food at a time.
The life of your food prep depends on how fast you eat it, as well as the methods you use to store and preserve your foods. Below, you will find guidelines for storing raw foods as well as cooked foods.
Basic Food Storage
The manner in which you store your food directly determines how long something will stay fresh. What may have, based on USDA guidelines, been fresh for 3-4 days, may only last for 2 days if stored improperly.
When purchasing containers, you can choose from glass or BPA-free plastic containers in a variety of sizes. There are benefits to both. Glass containers tend to be great for reheating items and on average, last longer. You can also easily wash these containers in the dishwasher. BPA-free plastic containers are more portable. They tend to be less expensive, are easier to store and most are dishwasher safe.
{NOTE: Information below was found via the USDA website.}
Storing Frozen Foods
Storage of frozen foods is very important, especially if you are interested in saving money and purchasing the majority of your items in bulk. Be sure to wrap your meats, sealing out as much air as possible to prevent freezer burn.
Raw Foods
- Chicken/Turkey, Whole – 1 year
- Chicken/Turkey, Pieces or Ground – 9 months
- Beef, Veal, Lamb or Pork, Steaks – 6-12 months
- Beef, Veal, Lamb or Pork, Chops – 4-6 months
- Ground Meats – 3-4 months
Cooked Foods
- Leftovers – 2-6 months
- Soups/Stews – 2-3 months
Thawing Foods
Once you decide to use your frozen raw or cooked foods, you have to choose a method to thaw it. Choose the one that best suits your needs and your timeframe.
- Best: Thaw in the Refrigerator – This process typically can be done overnight but may take up to 24 hours (or more for larger frozen meats like whole turkeys).
- Better: Thaw in COLD Water – Be sure to place your frozen item in a water-tight plastic bag. Replace the cold water every 30 minutes and cook immediately after item thaws.
- Good: Thaw in the Microwave – Determining the time in which it takes to thaw items in the microwave varies based on item weight and the wattage of your microwave. Refer to your manufacturer’s guide for guidelines. To avoid food illness, cook immediately after the item is thawed.
- Okay: Cook Frozen – There is no problem, according to the USDA, to cook items that are frozen. Ensure, using a food thermometer, that the item is fully cooked before you cease cooking. This process typically takes 50% more time for the item to cook thoroughly.
Storing Raw Foods
Refrigeration times for raw foods vary depending on the item. Consult both your grocer’s guidelines as well as this chart to determine the freshness of your food. If it doesn’t look right and/or doesn’t smell right, don’t use it!
- Ground Meats, Poultry, and Seafood – 1-2 days
- Roasts, Steaks, and Chops – 3-4 days
- Eggs in Shell – 3-5 Weeks
- Egg Whites – 2-4 Days
Appropriate Cooked Food Temperatures
Cooking meats to appropriate temperatures can significantly lower your risk of foodborne illness and save flavor in your foods. Use a meat thermometer and these USDA guidelines to cook your foods to the perfect temperature.
- Ground Meats: Beef/Pork/Veal/Lamb – 160 degrees F
- Chicken/Turkey – 165 degrees F
- Steaks, Roasts, and Chops: Beef/Veal/Lamb – 145 degrees F
- Poultry – 165 degrees F
- Seafood – 145 degrees F
Storing Cooked Foods
How long has something been in your fridge? Is this still good? You may get those questions often in your household. We recommend that you use a piece of painter’s tape or masking tape with the date to label your foods in your refrigerator. Most items stay fresh for approximately 3-4 days after cooking if stored properly, but there are exceptions to the rule. Use the chart below to determine if your food is still good.
- Meats, Poultry, and Seafood – 3-4 days
- General Leftovers – 3-4 days
- Soups and Stews – 3-4 days
- Boiled Eggs – 1 Week
POPULAR MEAL PREP RECIPES
BREAKFAST
- 4 Overnight Oat Recipes
- 6 Muffin Recipes
- Chocolate Peanut Butter Banana Mason Jar Oats
- Protein-Packed Breakfast Sandwich (chicken prepared in advance)
LUNCH/DINNER
- Zucchini Lasagna
- Salsa Chicken
- Savory Chicken Casserole
- Honey Chipotle Ground Chicken
- Crockpot Black Bean and Sweet Potato Turkey Chili
GROCERY LISTS
* We are in the process of updating the following posts but I wanted to go ahead and include them here.
- Costco Shopping List
- Publix/Kroger Shopping List
- Specialty Store Shopping List (Whole Foods, Trader Joes, etc)
- Amazon Shopping List
HELPFUL ARTICLES
- How to Eat Healthy on a Budget
- Budget-Friendly Protein Sources
- Frugal Meal Ideas
- Outfit Your Clean Eating Kitchen for Less Than $150
- Essential Meal Prep Tools
- 1,500 Calorie Clean Eating Meal Plan
- 1,800 Calorie Clean Eating Meal Plan
We used to have all of this information in an eBook for purchase but decided to make it available to everyone. If you would still like a copy of the eBook you can sign up for our newsletter (we never spam you!) and you will be directed to your free copy. Sign up here.
211
Amanda H. says
Thank you so much for sharing! I get so overwhelmed with food planning. This really helps!
Whitney Carlson says
You are welcome, Amanda! I’m glad it helped. Let us know if you ever have any questions!
Veronica Marie Starr says
Thank you. It really did help.
Veronica Starr
Issie says
Hi Scott & Whitney. Thanks for sharing a good tips. I do agree that prepping can save money, less food waste, stay on track to meet goals, and save time. I have a plan every 1 week in advance. And my coming camping at my backyard with family and friends, I also have a meal prep for this weekend camping.
By the way, I have to prepare and buy some tools for camping such as cooler for camping I bought from here (link). Could you please give me suggestion about essential tools for a small camping? It’s my first camping so I have no idea anymore. Thank you in advance for your suggestions.